Bind PCB port devicesDescriptionVirtual machine1、Open the virtual machine image2、Connect deviceMethod-1Method 2 (recommended)ROS expansion boardView the devices connected to the systemMethod-1Method-2 (recommended)
Bind PCB port devices
Description
Before following our Python Basic Control Tutorial and ROS Basic Tutorial, we need to bind our ROS Control Board device ID to a specified port number (aka device remapping). If it is not bound to the specified port number, it is very likely that an error will be reported when running the startup file. For example:
AttributeError:‘Rosmaster’ object has no attribute 'ser'
AttributeError:‘yahboomcar_driver’ object has no attribute 'velPublisher'
······(Most ROS function packages need to be bound to a specified port number, and the operation steps are basically the same)
Virtual machine
Use VMware Workstation to demonstrate device ID binding, and other motherboards (Raspberry Pi, Jetson series, etc.) can follow this step for device ID binding.
1、Open the virtual machine image
2、Connect device
Insert the device into the computer through the USB interface, there are two methods to connect the device.
Method-1
Choose to connect to the virtual machine

Method 2 (recommended)
In "Virtual Machine Settings" → "Removable Devices", select the corresponding device connection
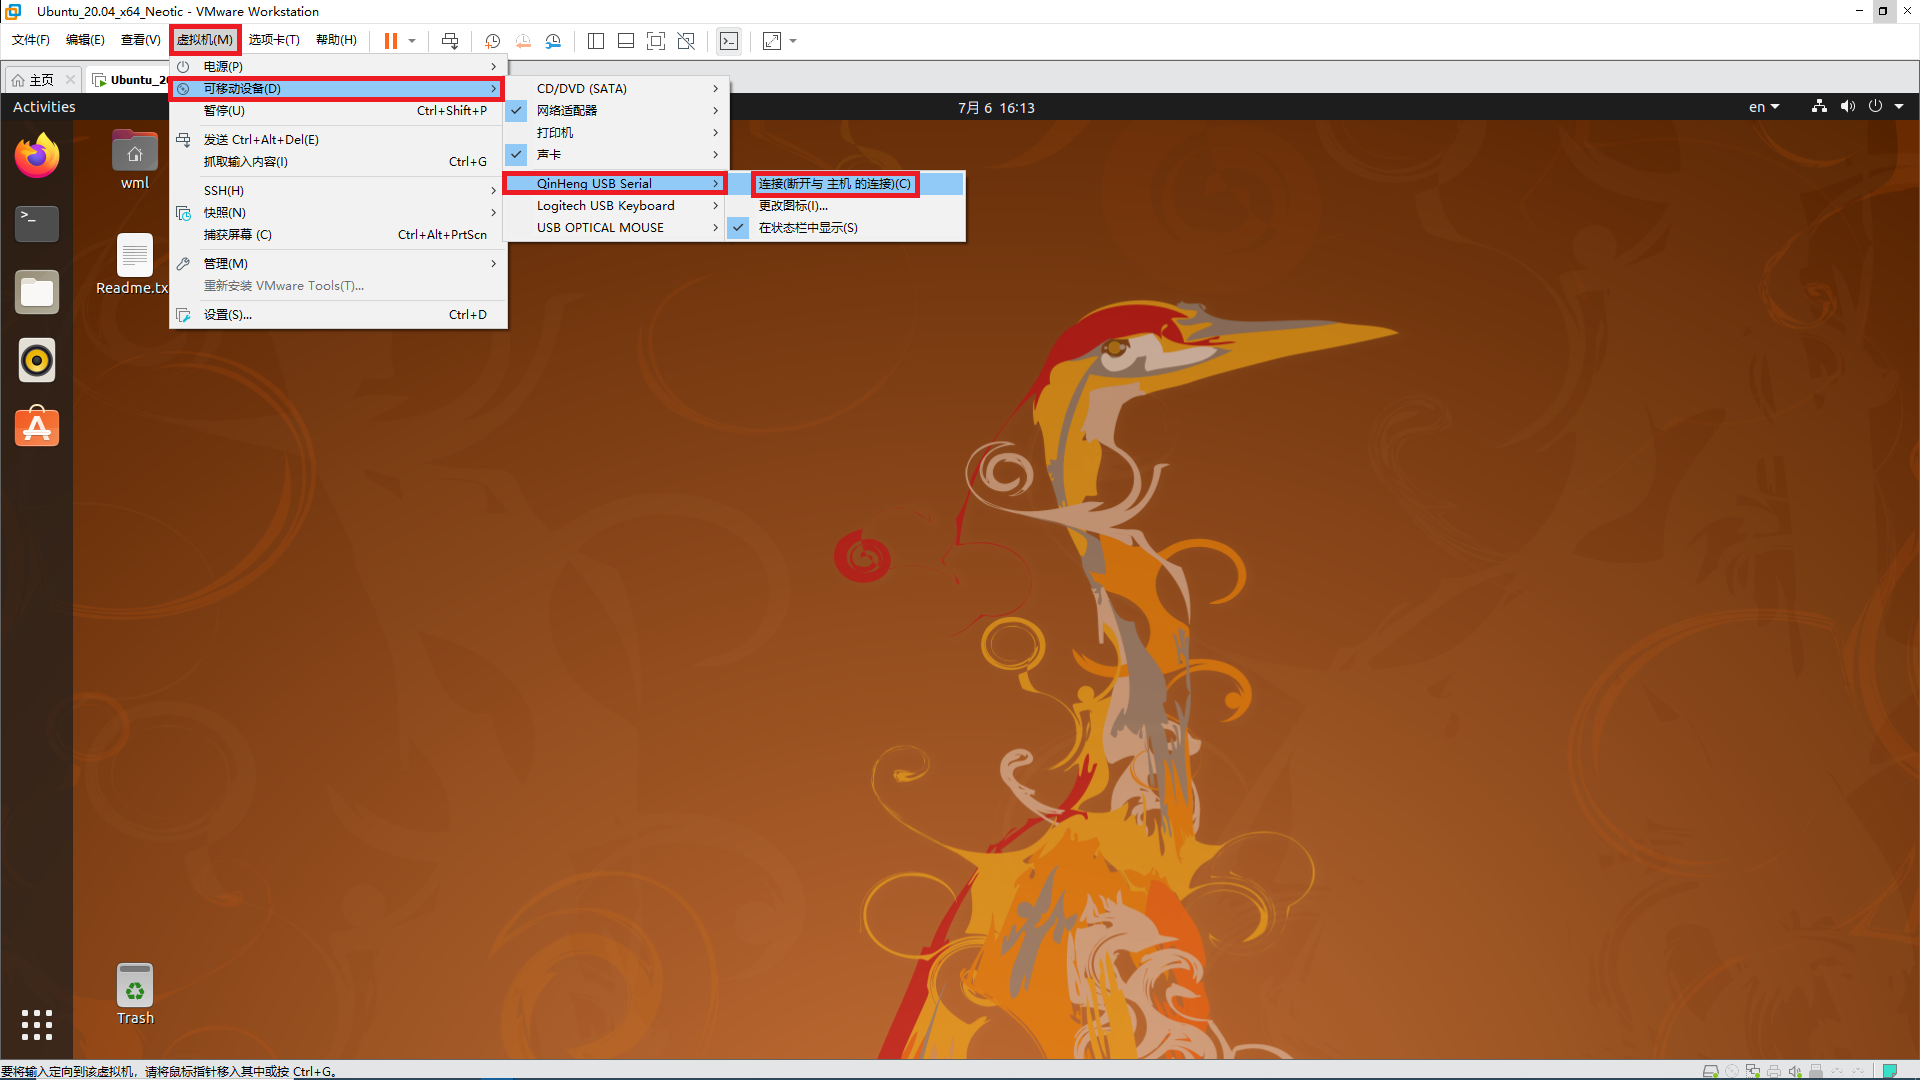
NOTE: The steps are the same for multiple devices connected to the virtual machine!
ROS expansion board
View the devices connected to the system
lsusb
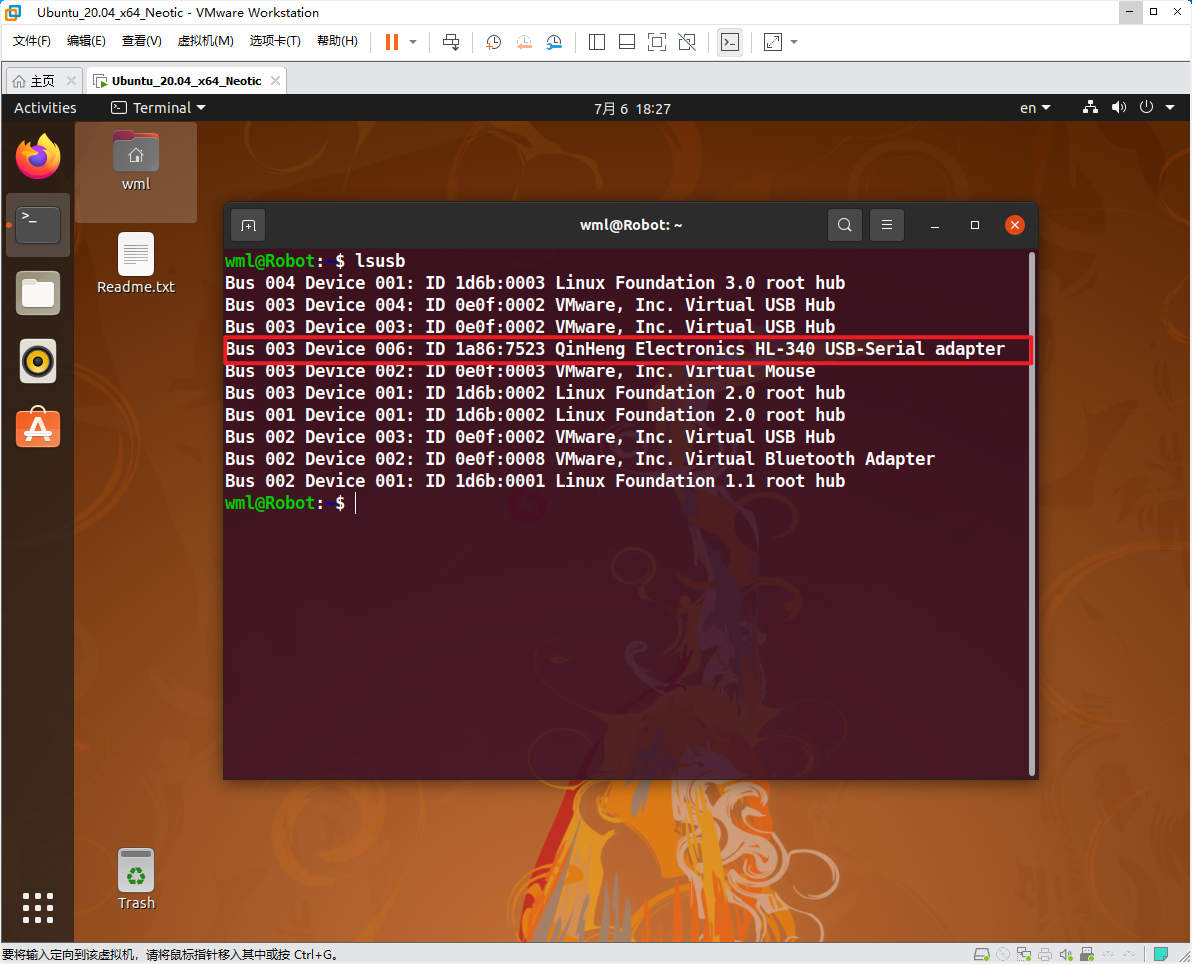
You can see the USB device information corresponding to the ROS control board through the lsusb command. (The device ID information we mainly focus on is 1a86:7523)
xxxxxxxxxxBus 003 Device 006: ID 1a86:7523 QinHeng Electronics HL-340 USB-Serial adapter
Method-1
Edit myserial.rules file
xxxxxxxxxxsudo nano /etc/udev/rules.d/myserial.rules
The ROS control board device ID information 1a86:7523 is required here, and the following is the content of the myserial.rules file
xxxxxxxxxxKERNEL=="ttyUSB*", ATTRS{idVendor}=="1a86", ATTRS{idProduct}=="7523", MODE:="0777", SYMLINK+="myserial"
Note: Binding failures often occur at this step. It is recommended to directly open the tutorial copy we provided.

Save the file and exit, then enter the following command to give execution permission to myserial.rules
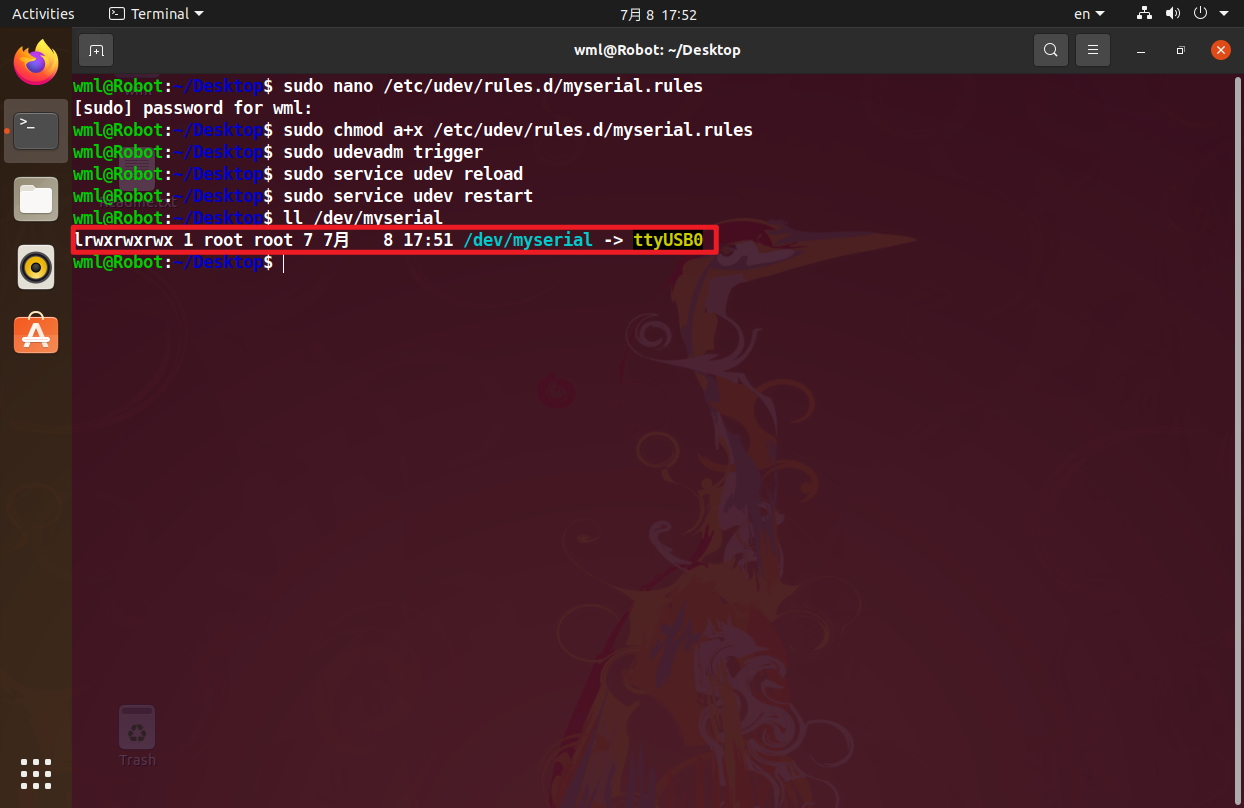
xxxxxxxxxxsudo chmod a+x /etc/udev/rules.d/myserial.rules
Enter the following three commands to re-plug the ROS control board device.
xxxxxxxxxxsudo udevadm triggersudo service udev reloadsudo service udev restart
Enter the following command to check whether the device number is successfully bound.
xxxxxxxxxxll /dev/myserial
When the picture shown in the figure below appears, it can be considered that the binding is successful.
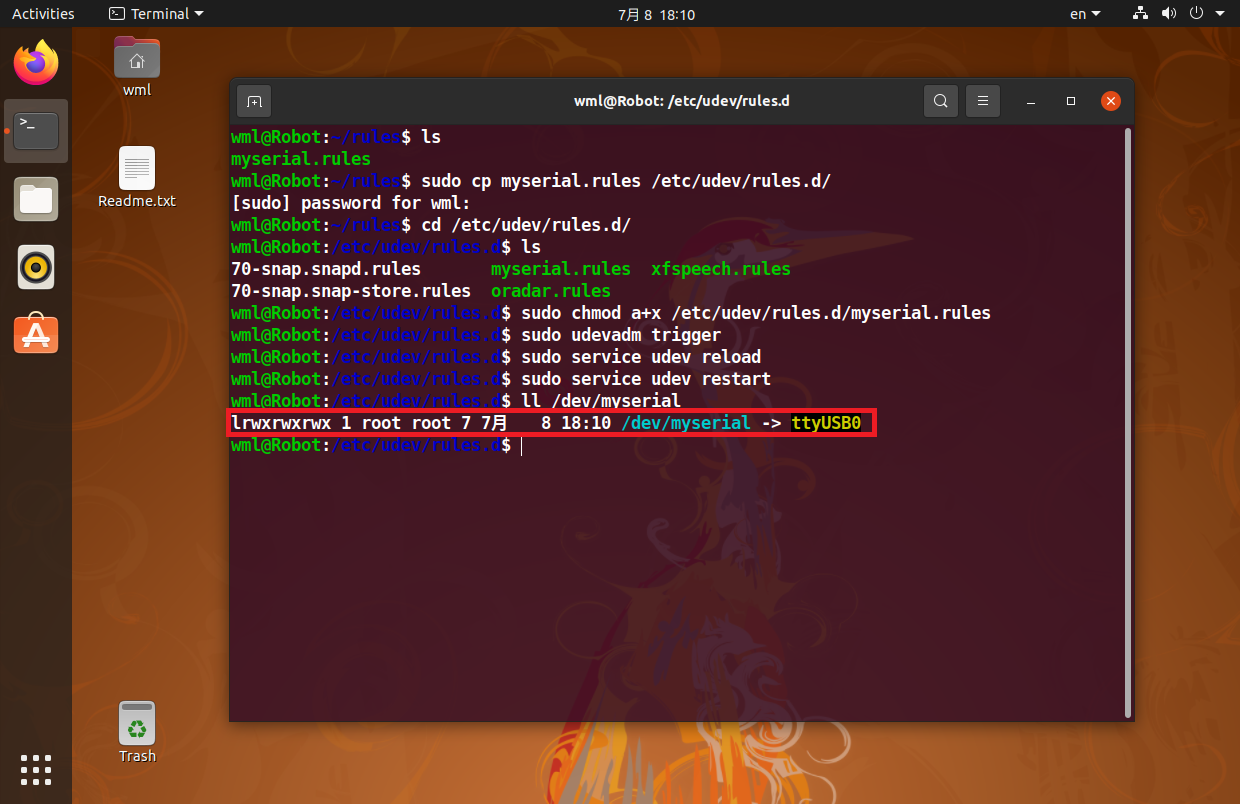
Method-2 (recommended)
First download the edited rule file, and then open the terminal in the directory where the myserial.rules file is located

Enter the following command to copy the edited rule file to the /etc/udev/rules.d directory
xxxxxxxxxxsudo cp myserial.rules /etc/udev/rules.d/cd /etc/udev/rules.d/ls
Then enter the following command to give myserial.rules execution permission
xxxxxxxxxxsudo chmod a+x /etc/udev/rules.d/myserial.rules
Enter the following three commands to re-plug the ROS control board device
xxxxxxxxxxsudo udevadm triggersudo service udev reloadsudo service udev restart
Enter the following command to check whether the device number is successfully bound
xxxxxxxxxxll /dev/myserial
When the picture shown in the figure below appears, it can be considered that the binding is successful.